Friday, 26 January 2024

Friday Faves 1.26

Hi friends! Happy Friday! The weekend is heeeeeere. What do you have going on? I’m taking my first Spenga class with a friend – I’ll report back!- and putting the finishing touchings on February Fit Team programming. New workouts drop on Sunday! If you want to try it, sign up here – the first 7 days are free.

I’m also looking forward to teaching a barre class, Meg’s baby sprinkle (Kyle and Meg are having baby #3 in a month and a half!), and a family hike. I hope you have a fun and relaxing weekend ahead.

(A leftover lunch of chicken with artichokes and mushrooms, plus radishes, broccoli and homemade hummus on the side)

It’s time for the weekly Friday Faves party! This is where I share some of my favorite finds from the week and around the web. I always love to hear about your faves, too, so please shout out something you’re loving in the comments section below.

 Friday Faves 1.26

Read, watch, listen:

Liv and I saw Mean Girls last weekend and LOVED it. I had low expectations but was blown away – I want to see it again.

SO proud of the #1 spot on this list! One of my all-time faves. Tucson has a few spots on this list!

Don’t miss this week’s podcast episode here chatting about breast implant illness.

What do you always pack for a trip?

Fitness, health, and good eats:

Latest pair of Vivobarefoots (<— my referral link gets you 15% off). This is the 7th pair to enter our house. The Pilot, P, and I are all on board the barefoot train. (Liv sticks to her Jordans and Converse.) It’s wild to see how constricting *normal* shoes feel now. They squish my toes so much! These are extremely light, comfortable, and plenty of room for proper toe splay and foot function. 😉

(Also worth mentioning here that this is the BEST shoe spray. I use it on all of the kids’ athletic shoes or anything canvas, like Liv’s backpack, and it helps them to not get trashed as quickly. It also keeps white sneakers super white and clean.)

We went to a wonderful dinner with friends last weekend and when I said I’d bring a cheese board, I didn’t think about transporting it. Thankfully, I press and sealed the heck out of it and it survived the drive! I added chocolate covered cherries, candied nuts, and rosemary sprigs for garnish when we got there.

These jerky sticks. I bought four to see if we would like them, and P ended up having three this week and requested more.. so there ya go. I tried one and it was amazing. I’m weird about jerky texture and this brand is soft and not too chewy. They’re seasoned perfectly and I appreciate that they include a blend of organ meats since I don’t typically cook with them. They’re so good for you, but I still get a little squeamish…

 More reasons to mix up your cardio with strength training.

Try these collagen brownies!

Fashion + beauty:

Latest RTR Unlimited find. I love this dress so much I’m thinking about keeping it.

Some latest Amazon fashion finds:

This sweater (I have it in pink and wear it all the time)

This striped sweater (another staple)

these flats – love them with black pants and a sweater with hoops

Happy Friday, friends!

xoxo

The post Friday Faves 1.26 appeared first on The Fitnessista.


from The Fitnessista https://ift.tt/iCWsFY0
via IFTTT

Thursday, 25 January 2024

TRX Kettlebell Circuit Workout

Hi friends! How’s the day going? Thank you so much for the beautiful birthday wishes for Miss P. I read them all to her and she loved them. (She also LOVED having everyone sing “Happy Birthday!”) I’ll be sure to recap the birthday festivities in one post after her party. 🙂 For today, I have a brand-new workout for you, combining two of my very favorite tools: the kettlebell and the TRX suspension trainer.

Trx and kettlebell circuit workout

(Wearing Nikes, lulu crops, and this Zella tank which I later realized was inside-out for all of these pics. Derp. haha)

TRX Kettlebell Circuit Workout

Kettlebells and the TRX add an entirely different dimension to training, as they target our deep internal core stabilizers. You have to work harder to maintain balance or center of gravity with the kettlebell, and the TRX encourages a plank position for the exercises. You’re in a moving plank the entire time. These are excellent tools to to challenge yourself and keep your muscles guessing!

The workout is meant to be completed circuit-style, moving quickly from one set of exercises to the next. After you finish one round of the entire circuit, you have the option to move through it again 1-2 times for 3 total times.

What Is Power Circuit Workout

Here are a couple of interesting things about this circuit, which increase its *excitement*:

-It’s a longer circuit (11 exercises). This use uses quite a few unilateral movements, focusing on one side at a time. If you’re in a time pinch, you can do a couple of bilateral movements instead. (For the burpees, do regular, non-TRX burpees, and for the kettlebell squat and press, hold two kettlebells instead of one. Ditch one of the squat exercises if you’re trying to bring down the time.)

-Speaking of unilateral movements, this is SUCH a great way to train. If we’re always training both sides at the same time, it’s easy to depend on your stronger side, or ignore how each side is feeling. You may find that you can make simple tweaks to improve form because you’re really paying attention to the working muscles.

-It’s a leg crusher. These are challenging movements to work your entire body, with a lower body and glute emphasis. You’re welcome. Mauaha.

As always, talk with a doctor before making any fitness changes. Honor your body and modify as needed. This workout assumes that you’re comfortable working with the TRX and kettlebell, and know how to execute these moves safely. If you have any questions, please let me know, or ask a personal trainer at your local gym to help you. We are happy (and stoked!) for the opportunity to help others work out more safely.

Now, let’s move onto the workout!

Trx kettlebell circuit workout

(Pin for the next time you need some gym inspiration!)

Form cues and tips:

1. Squat and reach: step away from the TRX base point, holding onto the strap with one hand. Sink down into a squat (chest listed, and weight in your heels), as you tap your free hand to the floor. As you exhale to rise, squeeze your glutes, and “chop” your non-TRX hand to the TRX. This is one rep.

2. Squat jump. You’ll be holding onto the TRX with both hands for the one -make sure you’re standing far enough away so it’s not flopping around, and has some tension- and use this as an excuse to really press into the ground and exhale to jump as high as you can. Make sure to land with soft knees.

3. Pistol squat: stand away from the TRX base point, holding onto the straps with both hands. The straps will be straight, and your chest will be lifted, with a tight core. Bring one leg off the floor and flex your foot, bringing the leg up as high as you can. Inhale to sink down into a squat (goal is to end up with your knees in one line) and exhale to rise. Really pay attention to the standing leg and keep it as stable as possible. Squeezing the glutes really helps. If you need to, start with a smaller range of movement. Modification: regular dumbbell walking lunges.

4. Single-leg squats: turn to face away from the TRX with one foot in a strap. You may have to step a bit out so that you can find a comfortable range. As you sink down into your single-leg squat, the foot in the strap will go back. Watch your front knee to make sure it doesn’t extend past your toes and keep your chest lifted. Modification: static lunges.

5. Biceps curl: facing the base point, step in a bit (the more you step in, the more challenging this will be) and straighten your arms. Think about bringing your entire body into a plank position, so you’re in one straight line. Flex your feet so your toes point up and heels are grounded. As you exhale, bend your arms to biceps curl. Inhale to extend with control. That’s one rep.

6. Chest press: face away from the TRX base point and keep that same plank position. Keep your shoulders down and core tight as you bend your arms to a 90-degree angle. Exhale and squeeze your chest to press the handles together. That’s one rep.

Squat press

7. Squat press: holding the kettlebell in one hand, sink down into your squat with a lifted chest, weight in your heels, and tight core. As you exhale, stand, and bring the kettlebell to shoulder height (inhale). As you exhale, press the KB up overhead, keeping your shoulder down. Complete all of your reps on one side before switching to the other side.

8. Kettlebell swings: ground into your feet and stand hip-width apart. Hold the kettlebell in between your knees and start to gently swing it so you can gain some momentum. When you’re ready, power through your hips, glutes and core to swing the weight up to shoulder height, then bend your knees, swinging it back to start. Remember that you are NOT using your arms to lift the weight; this is pure glute and core power. Every time the weight goes up, make sure you’re strongly exhaling.

9. Heel tucks: (I just wrote “hell tucks.” Pretty much.) You’ll start on your back with your feet in the straps, toes pointing up. Exhale to lift your hips off the floor, keeping your shoulders grounded into the floor. Take an inhale, and then exhale to bring your heels towards your glutes. Keeping the hips lifted, extend the legs back out. That’s one rep.

10. Plank and knee tucks: rotate your body (keep your feet in the straps with toes up, and as you rotate, your toes will point down towards the floor and stay in the straps) so you come into a plank position. Try to get your body into a straight line and your hips in line with your torso. Exhale to bend the knees in towards your chest. Inhale to straighten back out to plank.

Trx burpee

11. TRX burpee: with one leg in the strap, you’ll complete the classic burpee movement. Walk or jump back to plank, step your free foot forward, and jump off the floor. Complete all of your reps on one side before switching to the other side.

I can’t wait to hear what you think about this one! This is the workout I’ll be doing today, too. 🙂

Any favorite TRX of kettlebell exercises?

Have a wonderful day and I’ll see ya soon.

xoxo

Gina


*I’ll be running a 7-day reset starting on Tuesday, and there are so many amazing ladies (and guys!) in our Facebook group. To join in the fun, the info is all here. 

Photos by Arielle Levy.

The post TRX Kettlebell Circuit Workout appeared first on The Fitnessista.


from The Fitnessista https://ift.tt/H9eGIEP
via IFTTT

150: Breast implant illness and explanting with Dr. Robert Whitfield, MD

Hi friends! I have a new podcast episode live today chatting about a topic that has directly affected me: breast implant illness and explanting. I share all about my journey in this post and this post.

I’ve followed Dr. Whitfield for years and was thrilled when he was booked as a guest on the podcast.

He’s a sought-after provider who specializes in explant and breast implant illness, and also supports his patients in the preoperative and post-op healing journey.

Here’s what we talk about in today’s show:

What are the symptoms of breast implant illness?

How to support your body before and after explant?

Advice for those considering explant

and so.much more

Breast implant illness and explanting with Dr. Robert Whitfield, MD

Here’s more about Dr. Whitfield and his background:

Dr. Robert Whitfield has been a plastic surgeon for 26 years and board-certified for over 16 years. He specializes in Breast Implant Illness (BII), breast implant removal surgery and advanced cosmetic procedures such as his “No-Cut” Facelift. In addition to his exceptional work as a surgeon, Dr. Rob is a sought-after provider for his Holistic Accelerated Recovery Program (HARP). The protocols of HARP help to reduce systemic inflammation and assist patients who are both preparing or recovering from surgical procedures. Dr. Rob’s skills dovetail into a perfect balance of art and science and provides hope to scores of women looking to age gracefully or restore their health after BII.

You can check out his website here and follow him on Instagram here. 

More resources from this episode:

I love love love the meals from Sakara LifeUse this link and the code XOGINAH for 20% off their meal delivery and clean boutique items. This is something I do once a month as a lil treat to myself and the meals are always showstoppers.

If any of my fellow health professional friends are looking for another way to help their clients, I highly recommend IHP. You can also use this information to heal yourself and then go one to heal others, which I think is a beautiful mission. You can absolutely join if you don’t currently work in the health or fitness industry; many IHPs don’t begin on this path. They’re friends who are passionate to learn more about health and wellness, and want to share this information with those they love. You can do this as a passion, or start an entirely new career.

You can use my referral link here and the code FITNESSISTA for up to $250 off the Integrative Health Practitioner program. I highly recommend it! You can check out my review IHP Level 1 here and my review of Level 2 here.

I’m still obsessed with my sauna blanket. This is one of my favorite ways to relax and sweat it out. I find that it energizes me, helps with aches and pains, I sleep better on the days I use this, and it makes my skin glow. Link to check it out here. You can also use my discount FITNESSISTA15 for the PEMF Go Mat, which I use every day, and the red light face mask, which is a staple in my weekly skincare routine.

Get 20% off Organifi with the code FITNESSISTA. I drink the green juice, red juice, gold, and Harmony! (Each day I might have something different, or have two different things. Everything I’ve tried is amazing.) I’m currently obsessed with the shilajit gummies!

Thank you so much for listening and for all of your support with the podcast! Please be sure to subscribe, and leave a rating or review if you enjoyed this episode. If you leave a rating, head to this page and you’ll get a little “thank you” gift from me to you. 

The post 150: Breast implant illness and explanting with Dr. Robert Whitfield, MD appeared first on The Fitnessista.


from The Fitnessista https://ift.tt/AuYKsgp
via IFTTT

Tuesday, 23 January 2024

Hair Tissue Mineral Analysis (HTMA) Test review and my results

Sharing my experience with Hair Tissue Mineral Analysis and my results.

Hi friends! How are ya? I hope you’re enjoying the day so far. Today is admin stuff, plus a home strength training workout and breakfast for dinner tonight.

For today’s post, I wanted to share my experience with HTMA as one of the testing tools I’ve been using. I shared more about my food sensivity test here, and will do another post on my Candida, Metabolic, and Vitamins test. It’s been really incredible to get insights about imbalances, especially with the eye and autoimmune stuff I’ve experienced in the past year.

At first glance, HTMA seems like a *simple* test, but there’s so much that goes into it, and SO much that it can tell you. It’s a snapshot of how your body is responding to stress. When we’re stressed, we burn through our minerals more quickly, which can leave us depleted and exhausted. This can also be a very helpful postpartum tool, as babies use nutrients from the mom. The minerals work in pairs, so it’s important to examine the relationships between the minerals, and try to find balance. There will never be a *perfect* HTMA test result; it’s more about seeing improvements in your body over time.

Embarking on a journey to understand your body’s unique needs and intricacies is a powerful step towards holistic well-being. Today I’m going to share what this test entails, its benefits, the process, and my personal experience.

Note: This information is based on personal experience and education. Consult with a healthcare professional for personalized advice. This test does not dianose, prevent, treat, or cure illness or disease. It’s simply an informational tool for your unique body. 

Hair Tissue Mineral Analysis (HTMA) Test review

What is HTMA and What Can It Tell You?

HTMA is a diagnostic tool that analyzes mineral content in your hair tissue. As our hair reflects the mineral composition of our body, this non-invasive test offers a window into the past 90 days of mineral imbalances, heavy metal exposure, and potential nutritional deficiencies. It goes beyond surface-level symptoms, and can help uncover root causes of various health issues. Minerals are essential for our entire body and are the “spark plugs.”

Pros and Benefits:

HTMA provides a holistic perspective on your mineral status, aiding in the identification of imbalances that may contribute to health challenges. It can also give insight into your nervous system, adrenal function, thyroid function, and absorption.

Early Detection: Detecting mineral imbalances early allows for proactive adjustments to prevent potential health issues

Tailored Nutrition: With insights from HTMA, personalized nutrition plans can be crafted to address specific deficiencies and promote overall well-being.

Cons:

External Contamination: External factors like hair products or environmental exposure may influence test results. Choosing a reputable lab and following pre-test guidelines mitigates this concern.

How to Take the Test:

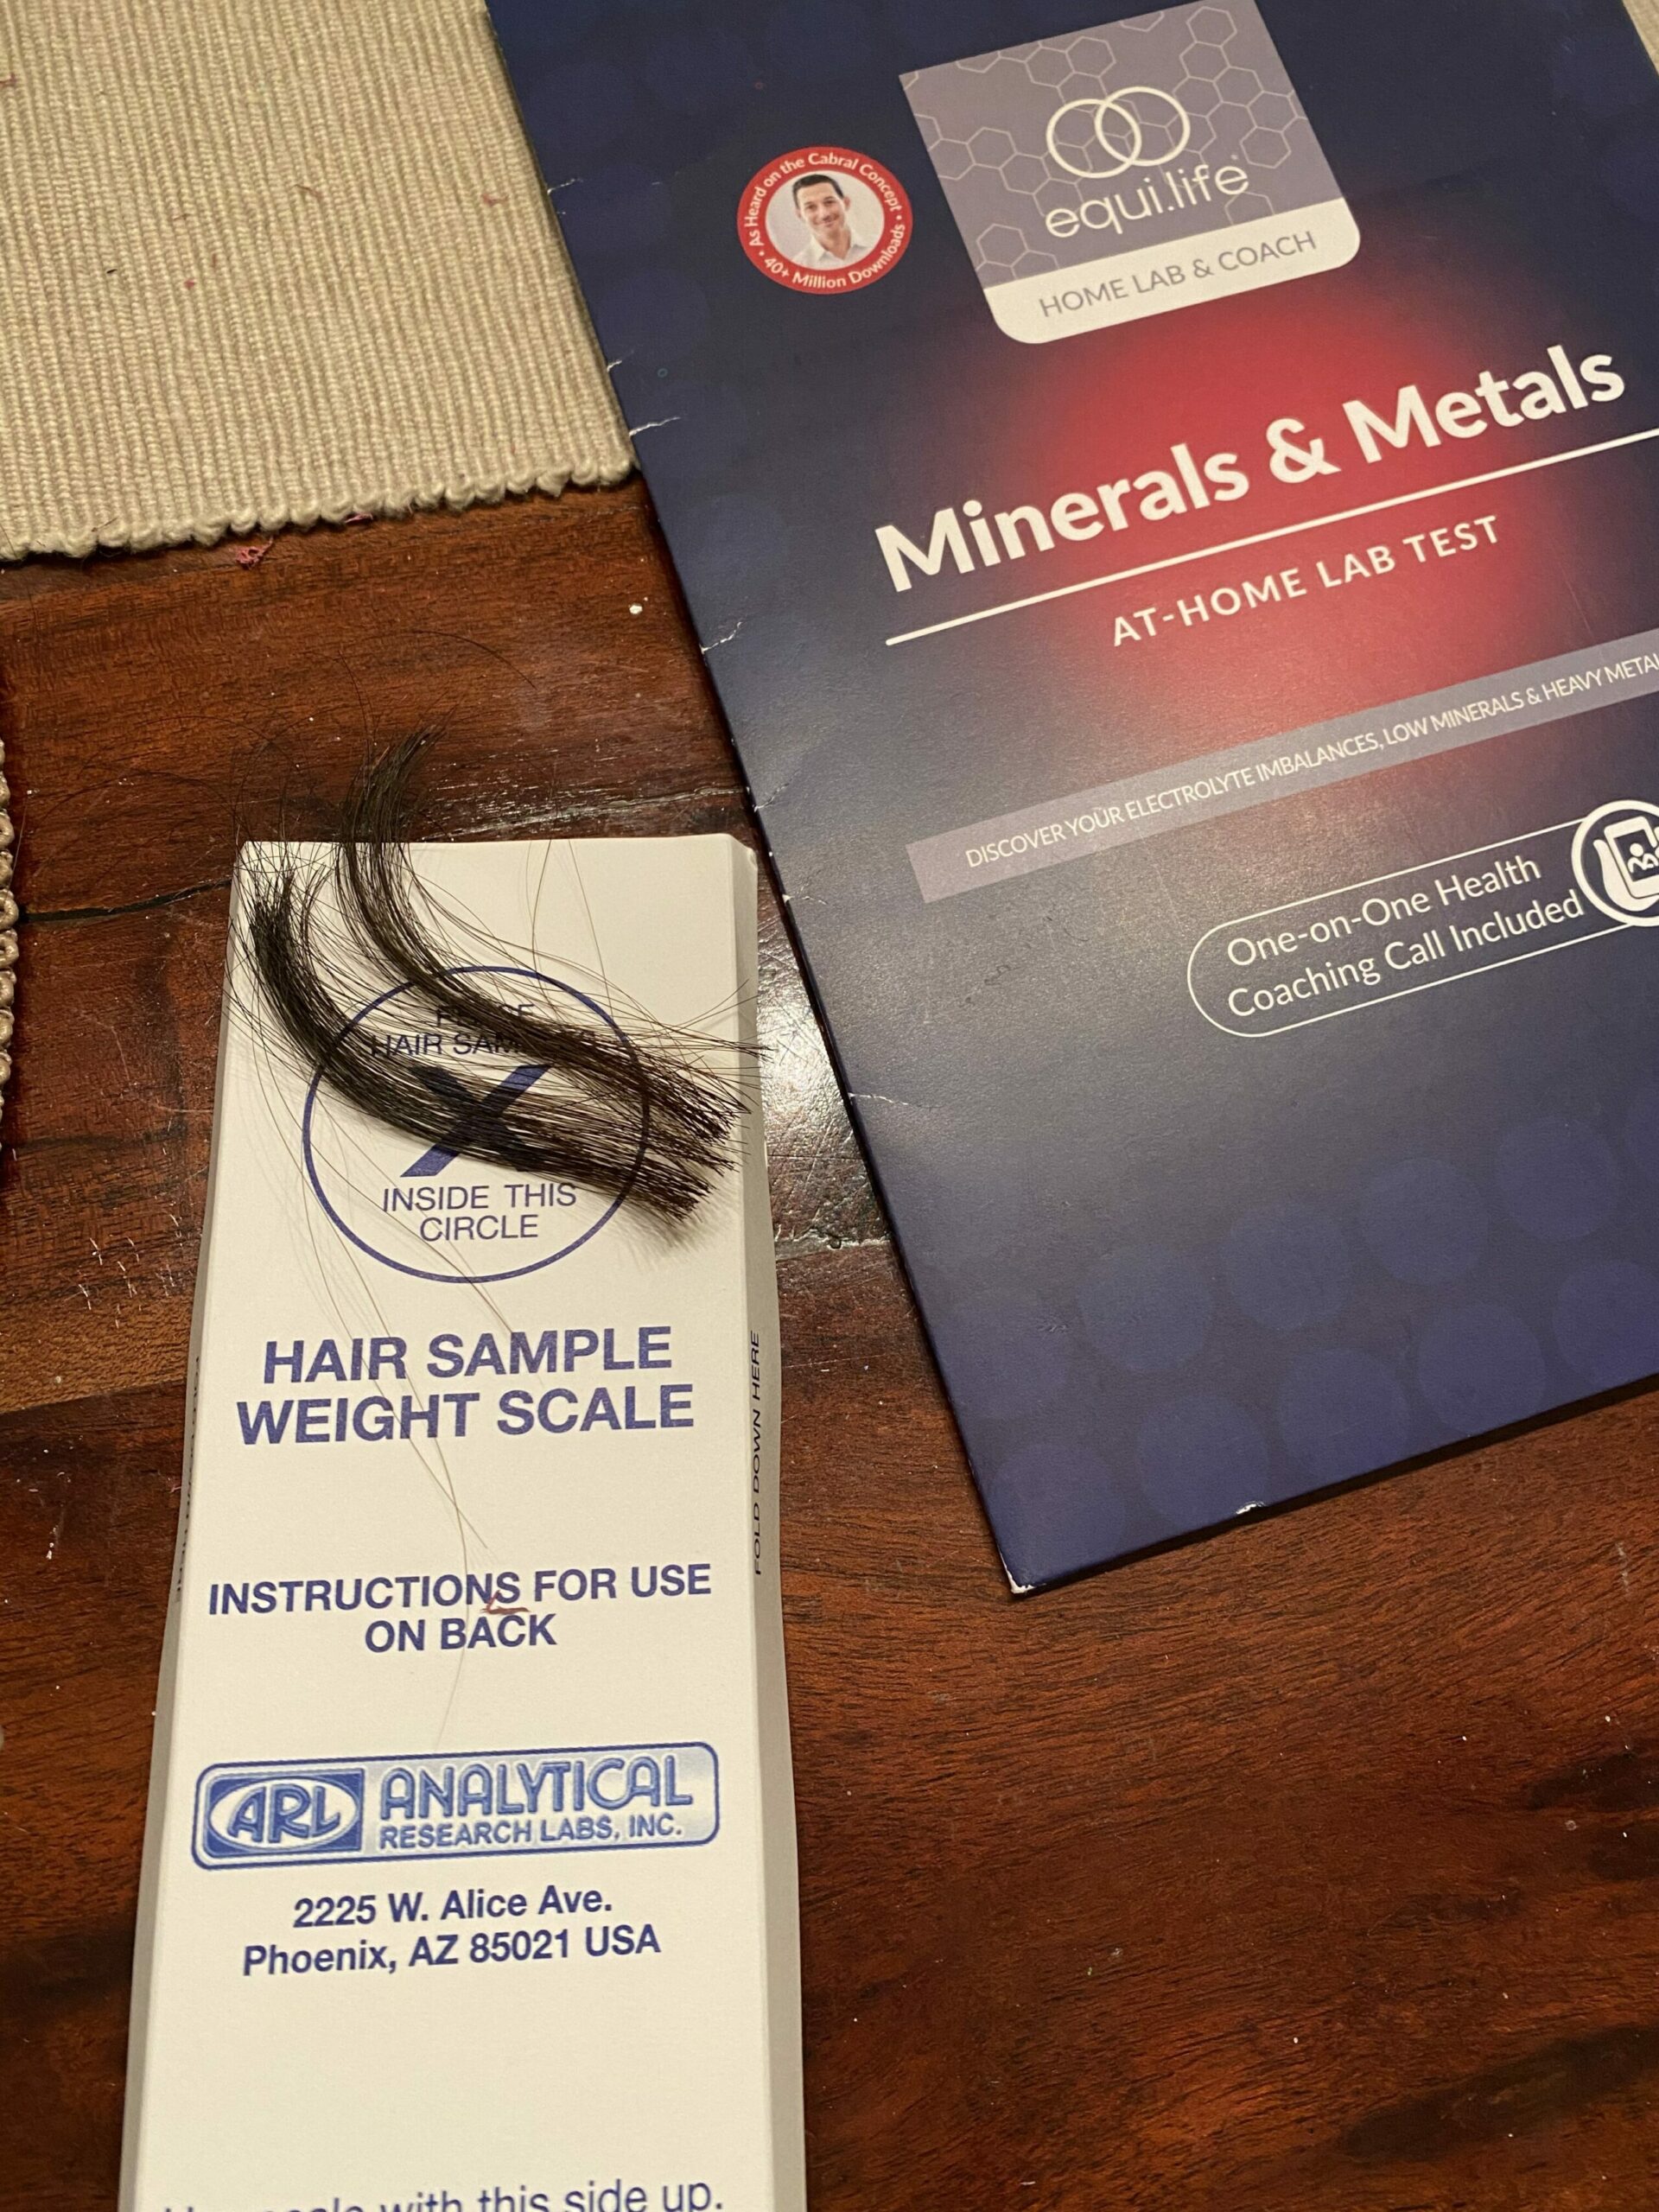
Order the Kit: Select a trustworthy HTMA provider and order your kit. (I work with clients with test-only packages, and as part of 1:1 coaching.)

Collect Hair Sample: Follow the kit instructions to collect a hair sample from the back of your head, closest to your scalp. You don’t need a ton of hair; it’s about a tablespoon. The test kit comes with a paper scale to ensure you have enough.

Send to Lab: Mail the sample to the designated lab for analysis.

This is my test – I did a full breakdown of the results over on IG.

Who May Benefit from HTMA?

Chronic Health Issues:

Individuals experiencing persistent health challenges may benefit from uncovering underlying mineral imbalances.

Athletes:

Optimizing mineral levels is crucial for athletes aiming to enhance performance and recovery.

Preventive Health:

Proactively addressing potential imbalances can potentially prevent future health issues.

The Breakdown of HTMA Results:

HTMA results offer a comprehensive breakdown of various minerals and heavy metals in your body. Key minerals include magnesium, calcium, potassium, sodium, and trace elements like zinc and copper. Elevated or depleted levels of these minerals can provide insights into potential health issues.

Understanding Mineral Imbalances:

Magnesium: Deficiency may contribute to muscle cramps, anxiety, and fatigue.

Calcium: Elevated levels may impact cardiovascular health and bone density.

Zinc: A crucial mineral for immune function; deficiency can affect wound healing and immunity.

Copper: Imbalances may influence energy levels and contribute to hormonal issues.

Interpreting Heavy Metal Exposure:

HTMA also assesses exposure to heavy metals like lead, mercury, aluminum, and cadmium. Elevated levels may indicate environmental exposure or impaired detoxification pathways.

Hair Tissue Mineral Analysis (HTMA) classifies individuals into different metabolic types based on their oxidation rate. This rate, commonly referred to as the metabolic type, categorizes people into fast oxidizers, slow oxidizers, or mixed oxidizers.

Here’s a very brief overview of each:

Fast Oxidizers:

Metabolic Characteristics: Fast oxidizers have a rapid oxidation rate, meaning their bodies process nutrients quickly.

Common Traits: They may experience bursts of energy followed by fatigue, have difficulty maintaining weight, and often crave sweets.

Nutritional Recommendations: Fast oxidizers may benefit from a diet rich in complex carbohydrates, moderate proteins, and healthy fats to help stabilize blood sugar levels.

Slow Oxidizers:

Metabolic Characteristics: Slow oxidizers have a slower oxidation rate, meaning their bodies metabolize nutrients at a more gradual pace.

Common Traits: They may struggle with low energy, weight gain, and experience cravings for stimulants like caffeine.

Nutritional Recommendations: Slow oxidizers may benefit from a diet emphasizing lean proteins, complex carbohydrates, and moderate healthy fats to support sustained energy levels.Mixed Oxidizers:

Metabolic Characteristics:

Mixed oxidizers exhibit characteristics of both fast and slow oxidizers, showcasing a balance between rapid and slow metabolic rates.

Common Traits: They may experience a combination of symptoms from both fast and slow oxidizers, making their nutritional needs a bit more nuanced.

Nutritional Recommendations: Mixed oxidizers benefit from a balanced diet that incorporates elements from both fast and slow oxidizer dietary recommendations.

My Personal Experience:

Having undergone HTMA, I discovered valuable insights into my mineral status. The test identified areas of improvement, guiding me towards targeted dietary adjustments and supplementation. While not a standalone solution, HTMA serves as a powerful tool in my holistic health journey. (My food sensitivity testing and OAT were also extremely insightful!)

If you’re curious about any functional testing, please send me an email gina@fitnessista.com subject TESTING

It makes such a huge difference to take supplements your body needs, instead of ones you think you *should* be taking (which can even be causing negative effects). New 1:1 clients that sign with a 3-month package, they’ll receive a free HTMA and Candida, Metabolic, and Minerals test (a $499 value).

Have a wonderful day and I’ll see ya soon!

xoxo

Gina

The post Hair Tissue Mineral Analysis (HTMA) Test review and my results appeared first on The Fitnessista.


from The Fitnessista https://ift.tt/FhmeDlC
via IFTTT

Monday, 22 January 2024

Honey Balsamic Dressing (healthy)

Sharing a quick and delicious recipe for a healthy salad dressing: honey balsamic!

Hi friends! Happy Monday! I hope you’re enjoying the day so far and that you had a great weekend! We had an amazing dinner at our friends’ house and spent the rest of the weekend doing chores and relaxing. I took a three-hour nap on Saturday which was everyyyytthing. After a couple of weeks of travel and the Pilot’s work weekend, it was our first *normal* weekend at home in a month, so it was very appreciated.

Today, I wanted to share my go-to salad dressing with ya. I can’t believe that I’ve been blogging this long and haven’t dedicated an entire post to this dressing. This is my go-to. I use it for dinner parties, make it in advance to enjoy throughout the week, and it’s always so easy and delicious. I don’t typically love the dressings that come with salad kits, so this is what I’ll often use to replace it. I like the taste and ingredients so much more!

If you don’t already make your own salad dressing, definitely give this one a try. You’ll see how simple and delightful it can be 🙂 Let me know if you decide to add it to your rotation!

Honey Balsamic Dressing Recipe

Crafting your dressing ensures transparency about the ingredients, helping you make informed choices about what you consume. The Honey Balsamic Dressing is a prime example of a flavorful yet health-conscious option. With just a handful of pantry staples, you can whip up a dressing that’s sweet, tangy, and incredibly versatile.

Ingredients:

1/3 cup balsamic vinegar

2/3 cup extra virgin olive oil

2 tablespoons honey

1 teaspoon Dijon mustard

1 minced garlic clove

1 teaspoon dried oregano

1/2 teaspoon dried rosemary

1/2 teaspoon dried thyme

Salt and pepper to taste

Instructions:

Step 1: The Foundation

Begin by combining the balsamic vinegar with extra virgin olive oil in a bowl. This dynamic duo forms the foundation of your dressing, delivering a perfect balance of acidity and richness.

Step 2: Add the sweetness

Introduce 2 tablespoons of honey into the mix, providing a natural sweetness that harmonizes with the balsamic’s acidity. Adjust the quantity based on your desired level of sweetness.

Step 3: Mustard

Add a teaspoon of Dijon mustard to the blend. This not only enhances the flavor profile but also contributes a subtle zing that elevates the overall taste.

Step 4: Season to Perfection

Season your creation with garlic and dried herbs, with salt and pepper to taste, ensuring the dressing reaches the perfect balance of savory and sweet.

Step 5: Emulsify with a Good Shake

Seal the ingredients in a mason jar, giving them a good shake. This emulsifies the mixture, creating a cohesive and velvety dressing that will beautifully coat your salad. I also love this salad dressing mixer. 

Storage and Serving:

This Honey Balsamic Dressing, stored in an airtight container in the fridge, can last for up to one week. Its versatility makes it ideal for green salads, vegetable bowls, or even as a marinade for grilled proteins.

Print

Honey Balsamic Dressing (healthy)

Sharing a quick and delicious recipe for a healthy salad dressing: honey balsamic!

  • Author: Fitnessista
  • Prep Time: 10 minutes
  • Total Time: 10 minutes

Ingredients

1/3 cup balsamic vinegar

2/3 cup extra virgin olive oil

2 tablespoons honey

1 teaspoon Dijon mustard

1 minced garlic clove

1 teaspoon dried oregano

1/2 teaspoon dried rosemary

1/2 teaspoon dried thyme

Salt and pepper to taste

Instructions

Step 1:

Begin by combining the balsamic vinegar with extra virgin olive oil in a bowl. This dynamic duo forms the foundation of your dressing, delivering a perfect balance of acidity and richness.

Step 2:

Introduce 2 tablespoons of honey into the mix, providing a natural sweetness that harmonizes with the balsamic’s acidity. Adjust the quantity based on your desired level of sweetness.

Step 3:

Add a teaspoon of Dijon mustard to the blend. This not only enhances the flavor profile but also contributes a subtle zing that elevates the overall taste.

Step 4:

Season your creation with garlic and dried herbs, with salt and pepper to taste, ensuring the dressing reaches the perfect balance of savory and sweet.

Step 5:

Seal the ingredients in a mason jar, giving them a good shake. This emulsifies the mixture, creating a cohesive and velvety dressing that will beautifully coat your salad.

Notes

This Honey Balsamic Dressing, stored in an airtight container in the fridge, can last for up to one week. Its versatility makes it ideal for green salads, vegetable bowls, or even as a marinade for grilled proteins.

For more inspiration on healthy salad dressings, check out my guide on healthy salad dressings.

Have a great day and I’ll see ya soon!
xo

Gina

The post Honey Balsamic Dressing (healthy) appeared first on The Fitnessista.


from The Fitnessista https://ift.tt/nINyMRJ
via IFTTT

Friday, 19 January 2024

Friday Faves 1.19

Hi friends! Happy Friday! How was the week? I hope you had a great one! We’re still going strong with 21 days of Healthy Habits, I’m finishing up the EquiLife detox, and am looking forward to starting the CBO protocol. (At least looking forward to finishing it?) What are you up to this weekend? P has a birthday party and horse lessons, Liv has dance, and we have a New Years’ dinner party with friends.

This past weekend, we met up with some friends at Great Wolf Lodge. It’s one of our favorite weekend getaways, buuuuut I think we booked it a little too close to our Disney trip. It was still a lot of fun, but I could tell the kids were tired. I tried to unplug and took zero pictures, but I did get one of the yoga studio. I try to take a class at Just Be yoga whenever I’m in Scottsdale. It’s a beautiful space and the classes are amazing – super hot with a mix of flows and stationary poses.

This is random, but I’ve been having a little bit of a struggle on Maisey’s walks lately, and maybe some of my fellow desert dwellers can help. The coyotes are OUT right now. We see at least one every day! Usually it’s at sunset, so I’ve been trying to walk her during midday, but we hear them howling every day and night, and the Pilot and the girls saw one on Wednesday. Any tips?? I definitely want to walk Maisey while the weather is nice, but I don’t want to have a run-in with a coyote….

Maybe I need to drive her to a more populated walking path instead of walking around the neighborhood. Here’s hoping for a coyote-free weekend ahead.

It’s time for the weekly Friday Faves party! This is where I share some of my favorite finds from the week and around the web. I always love to hear about your faves, too, so please shout out something you’re loving in the comments section below.

Friday Faves 1.19

Read, watch, listen:

Listening to this on Audible and it’s breaking my heart slowly. So many of us grew up with Friends, and when Matthew Perry passed away, it hit me hard. It felt like an uncle or a close friend had died. It’s surreal to hear this in his own voice, and no spoilers, but while I knew that he struggled, I had no idea of the intensity.

 This is me.

How to slow down and take care of yourself.

What’s your best and worst career advice?

Fashion + beauty:

Favorite blazer for a friend date to lunch.

(blazer is old from Anthropologie, skirt is here, shoes here, bodysuit here)

Already browsing swimsuits online. Here are some of my favorite mom suits.

Fitness, health + good eats:

(True Food redeemed itself. Last time we went, it was mehhhh, but this time, it was perfect.)

Really interested in the future of this.

 Quick and intense 30-minute barre video.

If you’re ready for new workouts, join us in Fit Team! You can try it for 7 days free here.

Happy Friday, friends!
xoxo

Gina

The post Friday Faves 1.19 appeared first on The Fitnessista.


from The Fitnessista https://ift.tt/ROw36T9
via IFTTT

Thursday, 18 January 2024

Crispy Ranch Air Fryer Chickpeas

Sharing this quick and healthy snack recipe for crispy ranch air fryer chickpeas!

Hi hi! How is the day going? We’re chilling here at home and taking it easy today. I’ve been studying, cleaning, participating in retail therapy, and cooking some tasty eats. I made one of my favorite easy air fryer recipes, super delicious air fryer chickpeas, and wanted to share the recipe with you.

The kids and I LOVE the Bienas chickpea snacks (we order them from Thrive Market!) but they tend to be a little on the pricey side, especially when the three of us consume a bag in a single sitting. I was looking at them the other day and thought it would be a fun experiment to try roasting chickpeas to make them on my own.

It was way easier than I thought and I made a giant batch that we enjoyed yesterday afternoon. These will definitely be making another appearance as part of meal prep and packed lunch snacks for the kids.

Crispy Ranch Air Fryer Chickpeas

Crispy Ranch Air Fryer Chickpeas Seasoning

2 cans of chickpeas or garbanzo beans, drained and rinsed

Avocado oil (you can also use olive oil)

Seasoning of choice. Since I did a version of homemade ranch seasoning by including onion powder, garlic powder, dried parsley, dried dill, dried chives, salt and pepper. You can also use ranch dressing mix or get wild and use Everything But the Bagel Seasoning, Dill Pickle seasoning, curry, anything you like!

How to make crispy air fryer chickpeas

Step one

Drain and rinse the chickpeas. Gently pat dry with a paper towel. Preheat the air fryer to 390.

Step two

Lightly coat the chickpeas with a drizzle of oil and make sure that they’re fully coated.

Step three

Make the seasoning mix in a separate bowl. Stir well and sprinkle the chickpeas with the seasoning mix.

Step four

Add the chickpeas to the air fryer, and make sure they’re evenly spread out into a single layer. Gently season with salt and pepper.

Step five

Air fry for 12-15 minutes, shaking the air fryer basket every so often, until golden and crispy, about 12-15 minutes.

Here’s the full recipe if you want to give it a try!

Print

Crispy Ranch Air Fryer Chickpeas

A super delicious and healthy homemade snack that the whole family will love!

  • Author: Gina Harney // The Fitnessista
  • Prep Time: 10 minutes
  • Cook Time: 12-15 minutes
  • Total Time: 0 hours
  • Yield: 8 servings

Ingredients

2 cans of chickpeas, drained and rinsed

Avocado oil

2 teaspoons garlic powder

1 teaspoon onion powder

1/2 teaspoon chives

1/4 teaspoon dried parsley

1 tablespoon Worcestershire sauce (optional but really adds a blast of flavor)

1/2 teaspoon dried dill

Salt and pepper

Instructions

Preheat the air fryer to 390.

In a large bowl, combine the chickpeas and all of the seasonings. Season well with salt and pepper.

Air fry for 12-15 minutes, making sure to shake the air fryer basket occasionally. Remove when they’re golden brown and crispy!

Top with additional seasoning as needed. Let cool slightly before serving.

Notes

Store any leftovers in a sealed container. They should last 3-5 days.

And a short how-to video:

Tips for using the air fryer:

– Don’t be scared! I was intimidated for a long time, and I also didn’t think it would be “worth it” as far as counter space goes. It’s worth it. We use it almost every day and it’s especially amazing for anything frozen, like fries and veggies. Potatoes are an air fryer dream, let me tell ya.

– Make sure there’s room in the air fryer basket for air to circulate. You don’t want to totally pack it.

– If you’re looking for an easier cleaning option, you can get some air fryer parchment.

A question for my air fryer friends: my only slight gripe is that ours is coated with a nonstick Teflon-ish material. I’m looking for one with a stainless steel basket if you have any recommendations!

Please let me know if you give this recipe a try. 🙂

Have a wonderful day and I’ll see ya soon.

xo

Gina

Don’t have an air fryer? No worries! You can make roast at 400 degrees on a cookie sheet for about 35 minutes. I have a BBQ chickpea recipe here!

More healthy snack recipes:

Vegan goji berry bites

Chocolate protein bars with sweet potato

Quick and easy snack bites

Top 5 easy healthy recipes for breakfast, lunch and dinner

The post Crispy Ranch Air Fryer Chickpeas appeared first on The Fitnessista.


from The Fitnessista https://ift.tt/scjLQht
via IFTTT